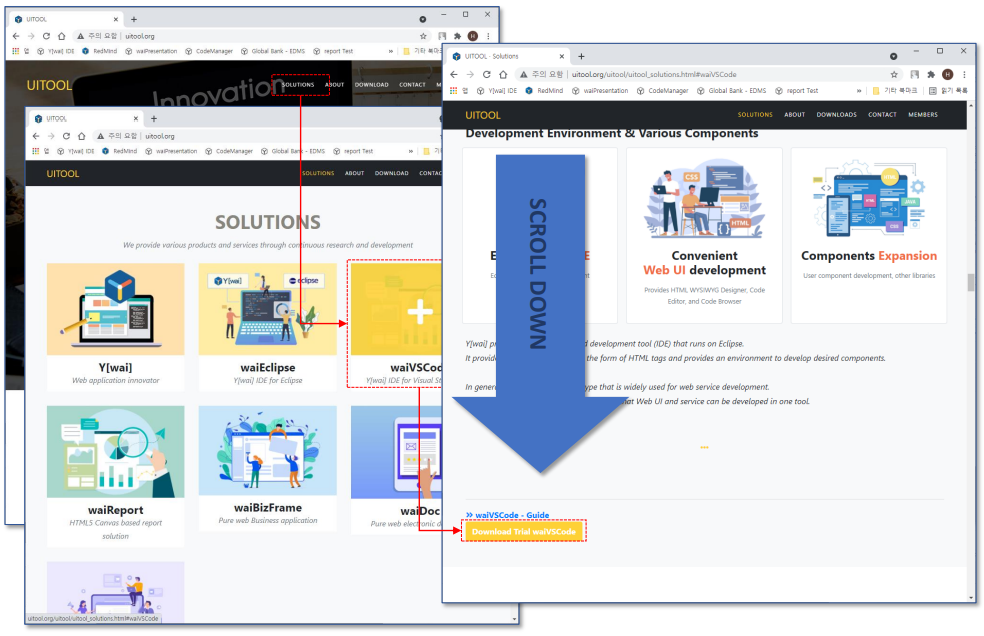
waiVSCode Installation Instructions
[ Step 1 ]
1. Click [ Download Trial waiVSCode ] button in UITOOL to download VSIX format
waiVSCode. |
|
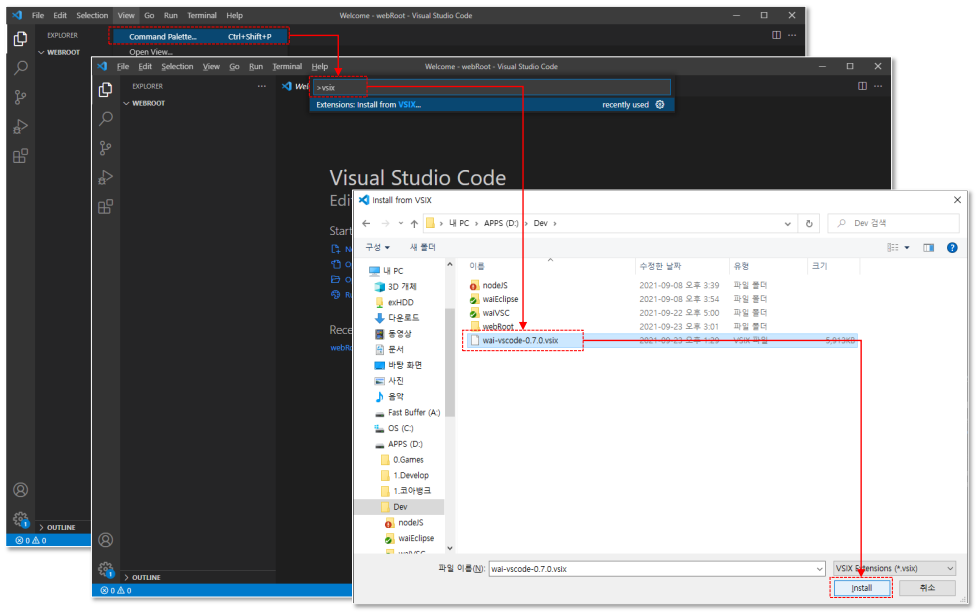
[ Step 2 ]
1. Run VSCode and select the 'View - Command Palette..' menu or enter 'Ctrl+Shift+P' to open the Command window. |
|
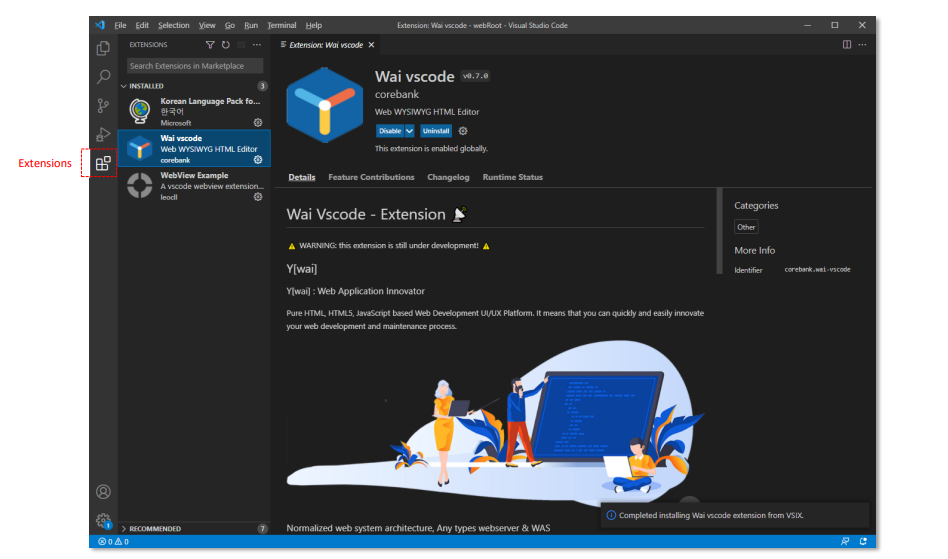
[ Step 3 ]
1. When the installation is complete, you can check that Wai vscode is installed in Extensions, and you can either Disable or Uninstall. |
|
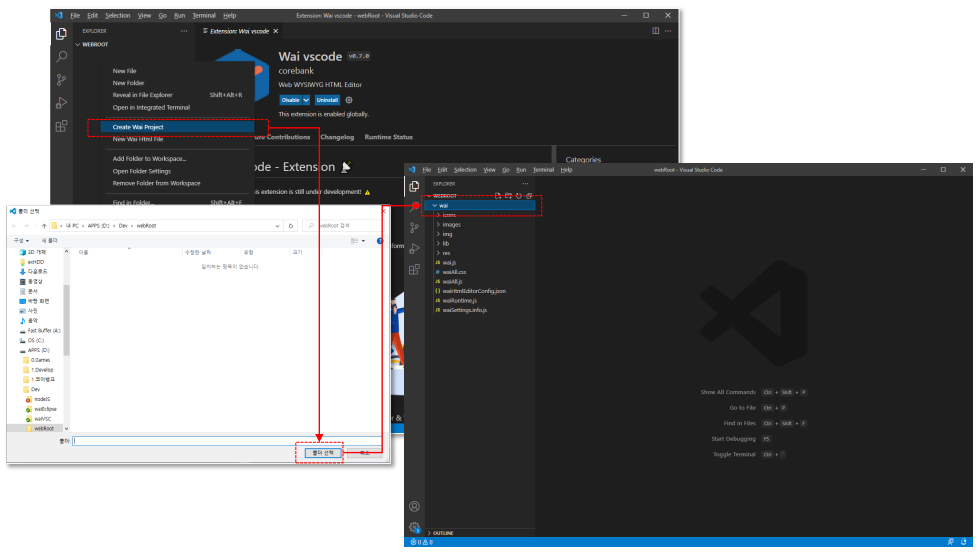
[ Step 4 ]
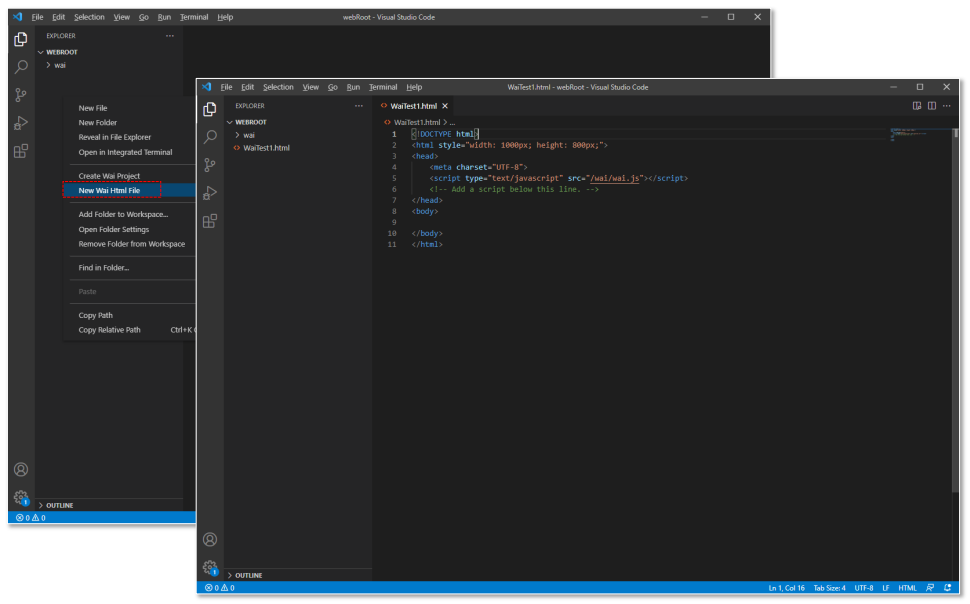
1. Right-click on the current working folder or a specific folder and select the 'Create Wai Project' menu to select the folder to be the web root. |
|
[ Step 5 ]
1. If you select a specific folder and select New Wai Html File from the right-click menu and enter a file name, an empty HTML file in the basic Y[wai] format is created. |
|
[ Step 6 ]
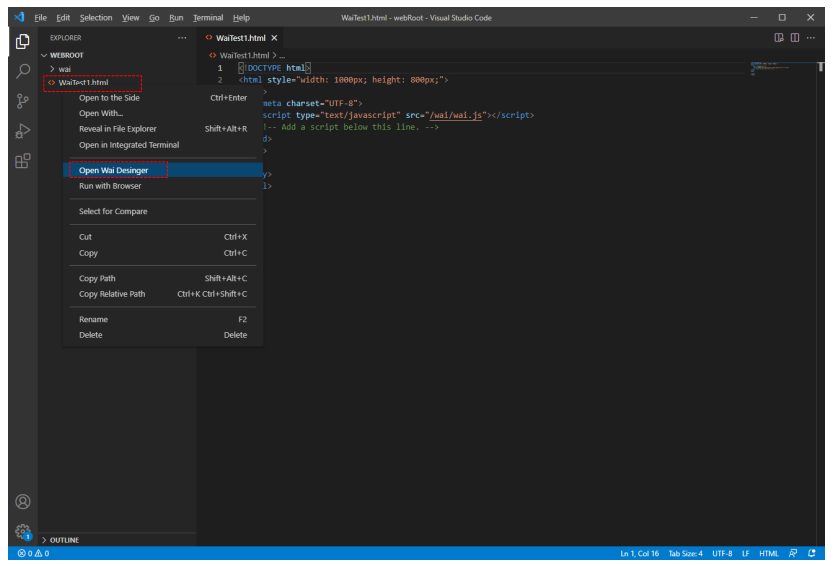
1. Open the right-click menu on the html created as New Wai Html File and select 'Open Wai Designer'. |
|
[ Step 7 ]
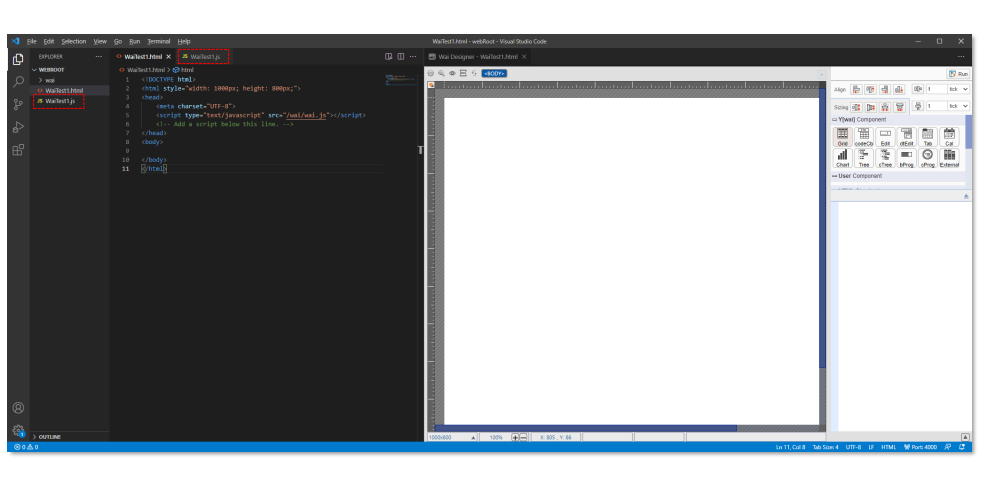
1. When opening wai html designer with 'Open Wai Designer', if there is no .js file with the same file name as the html name, a .js file is automatically created. |
|
[ Step 8 ]
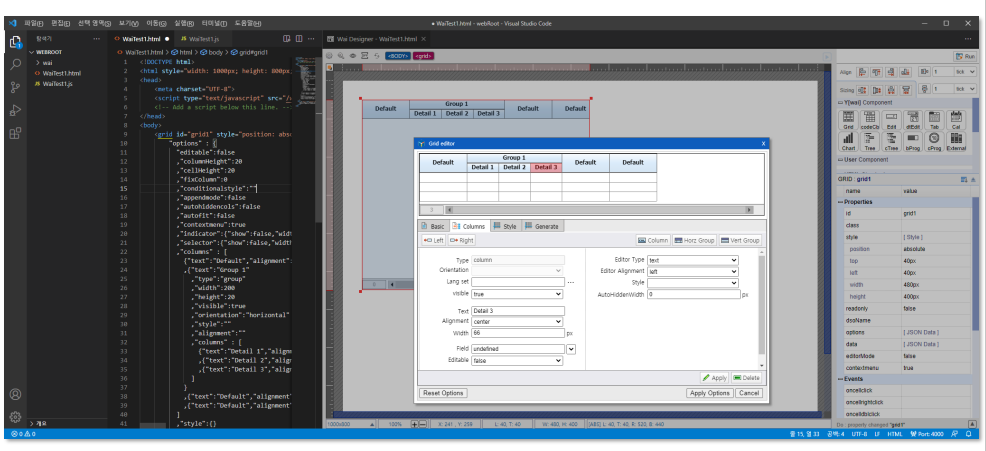
1. In Wai HTML Designer, basic HTML, HTML5 tags and Y[wai] components can be edited in WYSIWYG format. |
|